Bird Art Small Black White High Resolution or High Res or Hi Res
"Dang information technology, I'grand an artist, not a photographer!" How many of us have said that earlier?
Photography can be so technical and demanding. . . and expensive! Nevertheless, if y'all call yourself a fine artist, you must have a expert digital image file of all your masterpieces. But it is so darned hard, y'all say. Ah, only call back again. Getting a good shot of your painting could mean the difference between selling and NOT selling.
Quick proclamation - EmptyEasel has created a quicker, easier mode for artists to have their own art website. Click here to learn more than and get a simple art website of your own!
Perchance yous prefer to use a professional photographer. . . and that'due south okay, but it could lead to spending thousands of dollars per twelvemonth, if you're non careful. So permit's await into shooting 'em yourself, alright?
Here's how I recommend going about it:
1. Get an SLR camera
You will demand a fairly good camera (new or used) anywhere from a proficient point-and-shoot to an SLR camera like one of these on Amazon. It is best to take a lens which has a fleck of zoom capability since you will want to be able to zoom in slightly on your painting after you had the camera positioned.
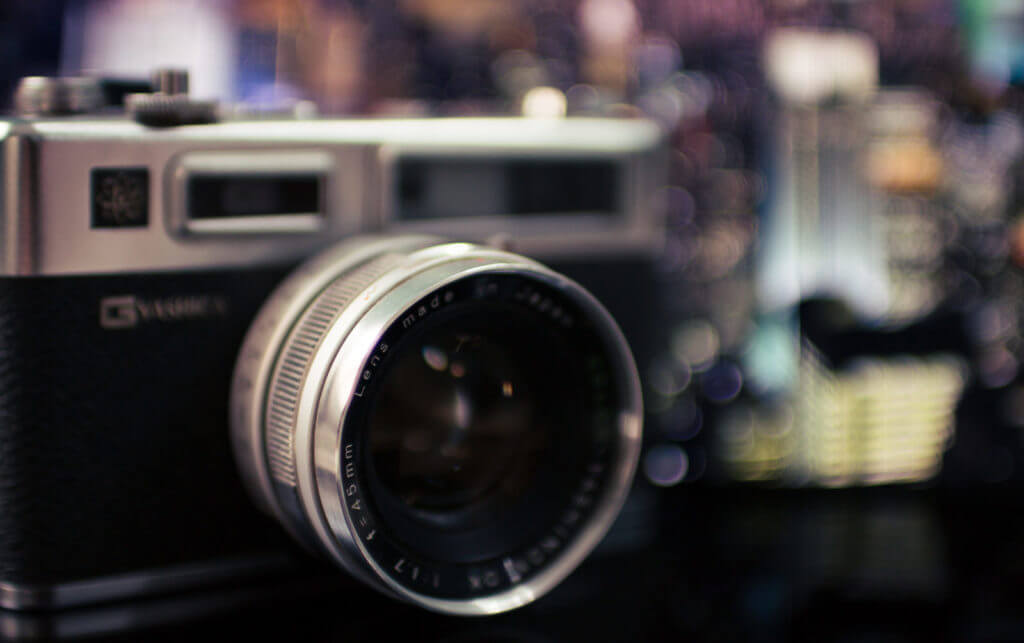
I personally use a Canon EOS Rebel SLR, and it works peachy for me. Don't even think of trying to use your cell phone camera. Even though some of really take a improve picture than an SLR, they merely won't work here. How are you ever going to hold it steady enough? It's quite impossible to get a cell phone photographic camera attached to a tripod. No hand-holding while taking your photos, okay? Point-and-shoot cameras and SLR's work best because they can easily be attached to a tripod.
2. That'southward right. . . you'll need a tripod
Holding a camera steady is probably the nearly of import thing y'all tin exercise to get a skillful shot, and the all-time way to do that is to use a tripod. Tripods don't take to be expensive, but they must be stable.
three. Next, take your fine art exterior
Y'all will about ever find outdoor lighting to be superior to indoor lighting. . . good old sunlight. The all-time outdoor condition is a cloudy, overcast day where the light is steady and defused throughout your shooting op.
And on a vivid sunny day with no clouds, yous still desire to put your artwork in the shade. Never let the sun fall on it. Choice the shady side of your dwelling house or building. Fractional cloudy days are the worst for shooting considering the lord's day is continually peeking in and out causing endless adjustments to your photographic camera settings. If you must shoot indoors, I will embrace that a fleck later.
four. Get your artwork square and level
Now for the placement of your artwork. . . yous could mount it on an outside wall (in the shade, of course) as long as you lot go along the painting perpendicular, square, and not leaning forward or backward—not even one iota. Use a level to brand certain.
Using a strong, sturdy easel is really all-time for mounting your painting—an easel that could be moved about slightly in i direction or another if needed. Y'all can secure your painting safely on the easel by clamping downwards pinnacle and bottom.
It is very important to keep your painting as perpendicular to the pavement or ground as possible. . . that means Direct-UP-AND-DOWN, not leaning forward or backward. The objective is to continue both your painting and your photographic camera lens perpendicular and parallel to each other, on the same plane. Brand certain the easel is heavy plenty to withstand sudden gusts of wind at that angle. Sandbags could exist used for weight, if necessary.
5. Identify your camera directly in front of your fine art
Now allow'south plough our attention to the photographic camera and tripod. I assume y'all have go familiar on how to attach your camera to the tripod. Some tripods take a bubble level built in to assistance you lot get the photographic camera level with the ground. If yours does not have a level, then practise the best you can by eye or use a pocket-sized hand level.
Move the photographic camera and tripod in shut toward the painting and so you can only barely see all of your painting in the viewfinder. If you have a zoom lens, effort zooming in and out while trying to get the entire painting epitome to fill the viewfinder. You may even take to move the tripod forward or backwards a footling.
Once you get that established, the next thing to do is notice the exact center of your painting (don't movement the painting or the camera at this betoken). Finding the center is as easy as putting a straight-edge diagonally from corner to corner, so do the aforementioned for the other two corners. You will detect the exact centre of your painting is where the ii diagonal lines cross in the heart. I usually put a small piece of tape on the painting to marking where the center is.
At present, go back to your viewfinder to see your piece of record. You lot may need further positioning of the tripod or photographic camera, but exercise not minimize this step. It is critical to get the lens centered straight on the centre of the painting! If you don't, your paradigm volition be distorted. . . narrow at the elevation, fat at the bottom, or only the opposite.
You want your image to take parallel sides, right and left. . . tiptop and bottom. Some SLR lens may give yous a barrel effect in the viewfinder, where all the sides appear to bulge outward slightly. Information technology this happens to y'all, information technology means you accept gotten the camera lens too close to the painting. But back your tripod abroad a bit, then reset your camera to the piece of tape in the middle.
Bonus tip! When I was just a rookie, an old photographer friend of mine, Harry Merrick, attached a tiny mirror instead of tape to the verbal center of his shots. I asked him why he did that, and he said, "When I look through the viewfinder and see my own middle in that mirror, I know I'm dead-heart." His shots were never, ever distorted.
6. Use the following camera settings. . .
Turn off your wink. You lot never want to use it when photographing artwork.
Use your automated settings. In that location are multiple settings that go from fully automatic to a range of manual settings. The professionals like the transmission settings because it gives them more control with the shot. I by and large utilize the automated setting and let my SLR photographic camera practice the work. I may apply some transmission settings merely to go a pick of unlike shots.
Most pros also shoot in RAW. . . no, they don't shoot in the nude! RAW is a file format, an internal setting in your camera which allows you to capture the most digital information possible—equal to film. These digital files are huge. All SLR cameras take this capability, and almost of the later model indicate-and-shoot cameras do too. The RAW format stores data in a raw, unprocessed state and gives the photographer virtually unlimited editing capability.
I personally shoot all my artwork in the RAW format with an automatic camera setting. You should likewise if your camera allows it. The just disadvantage is that RAW images take up huge amounts of room on your retentivity card. This may audio like overkill, simply RAW gives you lot 4 trillion different colors which enable yous to make serious alterations to colour balance, exposure, and contrast during editing.
In summarizing your camera settings, go for the automatic style until yous garner more than photography experience; and shoot your pics in RAW format with the flash turned off.
7. Add stability with a shutter release cablevision
Now that your camera is secure on your tripod, you tin can farther enhance stability and reduce any lasting vibrations by using a shutter release cablevision. These cables fit almost all cameras and are inexpensive, and they certainly help avoid camera-jerk when pressing the shutter button by mitt.
8. Focus (using zoom) and take lots of shots
Remember, with digital photography yous can shoot tons of photos and delete any you don't like. Focus your lens on your painting and get the sharpest focus possible by manus. Subsequently paw-focusing, most SLR cameras take a push button that volition zoom in for superfine focusing. I hit my button once, then twice, and it takes me into a very tiny section on my painting where I can farther refine my mitt focus. Now I know it is really focused.
Later double checking all my photographic camera settings, I printing my shutter release cable button half style downward to allow the camera to perform further automatic focusing. Then I press it all the manner and hear the click of the shutter. You lot should take several photos and experiment with various settings or white balances, simply write downward your settings with each shot. Delete the shots you don't like. Import your shots into your computer.
9. Keep your photos organized
Salvage all your proficient shots in a RAW Folder in your estimator. Each photo will be approximately 40 megabytes in size, so make certain you delete the ones that are not satisfactory. This becomes your primary file folder for RAW images. If I programme to edit or crop i of these images, I make a re-create first, and so I exercise my editing on the re-create. . . always keeping the master RAW file intact.
10. And if you're shooting indoors. . .
All of the pre-setup steps are the same as outdoors, except we will just substitute sunshine for artificial, homo-made lighting. Your expenses only went up a bit. . . how much? Depends on what you are willing to spend, simply let'due south accept the cheap way out. In my early days, I went to Dwelling house Depot and bought 2 of those inexpensive, clamp-on lights. I bought 2 blue, yard watt photograph bulbs for $3.00 at a local photo store, and I was in business.
However—it took me hours and hours of trial and error considering I would clamp my lights on stepladders, book cases, and anything else I could find nearby. I was always fighting "hot spots", just I somewhen got the task done.
Then I bought a lighting kit, and things got easier immediately. Photo lighting kits comes with everything you need for good lighting techniques including stands, umbrellas, reflectors, and bulbs. Prices commencement around $fifty and tin get equally high as $300-$500. Some professional person spend as loftier as $10,000 with synchronized strobes and all.
No matter how expensive yous go, the key to using indoor lighting is symmetrical placement. Y'all should position one light on each side of your camera at 45 degrees from your painting. They should also be at the same top as your camera lens. Baby-sit against uneven lighting and "hot spots." You will probably get through an "experimental" stage until you lot larn how close or how far away to place your lights. Yous may fifty-fifty want to use a measuring tape to maintain symmetrical placement.
I was hoping to keep this commodity brief, only there'due south just and then much to cover when learning how to shoot artwork. I could easily go into a deeper level in all aspects. If yous have further questions, send me an email and I will try to assistance. Happy shooting!
Special thanks to Keith Alway for these fantabulous photography tips! For more than from Keith, please visit his website at www.keithalway.design.
![]()
Annotation: You may also be interested in EE'south step-by-step drawing guide for artists. Click beneath to acquire more than!
This post may comprise affiliate links.
Source: https://emptyeasel.com/2018/07/16/how-to-take-high-res-photos-of-your-art-for-prints-giclees-and-art-cards/
0 Response to "Bird Art Small Black White High Resolution or High Res or Hi Res"
Enregistrer un commentaire